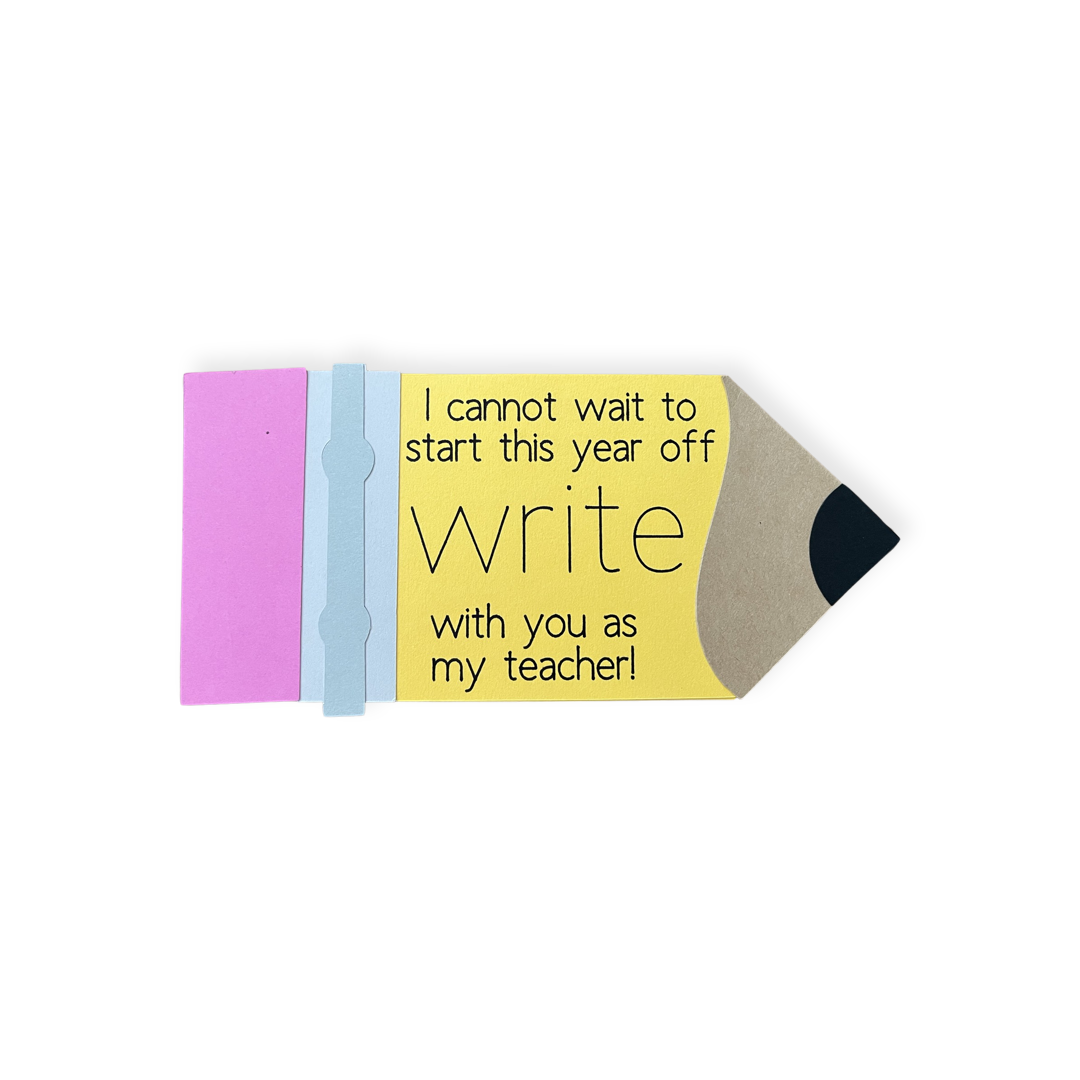
As the school year approaches, I wanted to send a little gift to my son’s teachers on the first day of school. Rather than just sending a gift card in an envelope, I opted to make something a little extra special. After scouring Pinterest for some theme ideas, I set out to create my gift card holder.
I used the Cricut Maker to cut all of the pieces for this project. The pencil image is one that I already owned from my previously linked cartridges. However, the image can be purchased for a nominal fee in the software. If you are interested in creating this project, I linked my design file under the materials needed section below.
Materials Needed
- Design
- Cardstock: pink, tan, black, yellow, light and dark grey
- Cricut Maker
- Perforation Blade
- Cricut fine point pen: black
- Adhesive
- Gift card
Instructions
- First access the file from the link above.
- Following the directions, cut the design out of cardstock using the Cricut Maker.
- Next, assemble the front of the pencil with the adhesive of your choice.
- Attach the gift card to the holder.
- Glue the cardholder to the backside of the top pencil panel.
- Finally, glue the back panel of the pencil to the top. Make sure the tab that says pull is facing outward.
Here’s the video tutorial on how to create a pencil gift card holder.
I hope that you found this tutorial easy to follow. If you used this video to help you make your own gift card holder, please comment here and share it with me. Don’t forget to follow me on social media and tag me there as well. I am excited and can’t wait to see your new creations! For more ideas, see how to create a centerpiece for your table here.


